
There is something so comforting about a pan of homemade rice krispie treats. They are simple, nostalgic, and always disappear faster than you expect. I love how a handful of basic pantry ingredients can turn into chewy, buttery squares with that perfect sticky marshmallow pull. If you have ever wanted a foolproof version that stays soft instead of turning hard, this is the recipe I come back to again and again.
What makes these especially good is the texture. The marshmallows melt into a smooth, glossy mixture that coats every bit of puffed rice cereal, and when you press everything into the pan gently, you get bars that are light, tender, and satisfyingly chewy. They are perfect for after-school snacks, bake sales, parties, lunchbox treats, or those moments when you just want to make something sweet without turning on the oven.
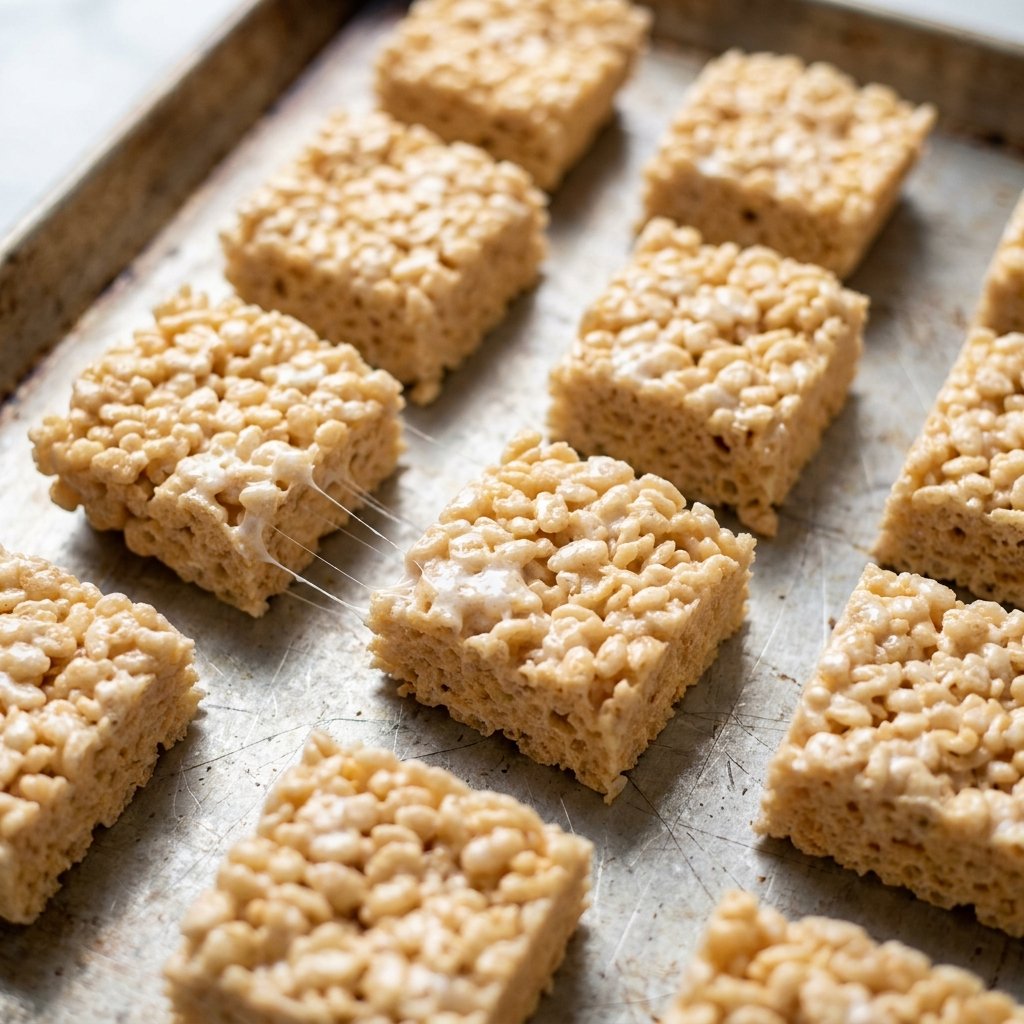
I also love how approachable this recipe is. You do not need special equipment, advanced baking skills, or a long ingredient list. I am going to walk you through every step so you can make rice krispie treats that look like those soft, marshmallowy squares you always hope for, complete with those irresistible little strands of melted marshmallow between pieces.
Quick Recipe Info Card
- Prep time: 10 minutes
- Cook time: 10 minutes
- Total time: 20 minutes
- Servings: 12 squares
- Difficulty: Easy
Why You’ll Love It
- Made with just a few inexpensive pantry staples.
- No oven required, which makes it perfect for warm days or quick cravings.
- Soft, chewy texture with plenty of gooey marshmallow in every bite.
- Easy enough to make with kids or for beginner home cooks.
- Perfect for parties, lunchboxes, holidays, and casual desserts.
- Ready in about 20 minutes, plus a little cooling time.
- Easy to customize with extra marshmallows, vanilla, or fun mix-ins.
Nutritional Benefits and Adaptable Variations
- Portion-friendly treat: These bars are rich and satisfying, so one square usually does the trick.
- Quick energy: Puffed rice cereal and marshmallows make this a fast snack for active days.
- Easy to make gluten-aware: Use certified gluten-free crispy rice cereal if needed, and always check labels.
- Add a little flavor depth: A splash of vanilla extract gives the marshmallow mixture a warm bakery-style flavor.
- Make them extra gooey: Stir in a small handful of mini marshmallows right before pressing into the pan.
- Try a festive version: Add colorful sprinkles on top for birthdays or holidays.
- Use browned butter: For a richer, nuttier flavor, lightly brown the butter before adding marshmallows.
Ingredients
- 6 tablespoons unsalted butter
- 16 ounces mini marshmallows, divided
- 1 teaspoon vanilla extract
- 1/4 teaspoon fine salt
- 6 cups crispy rice cereal
Step-by-Step Instructions
- Lightly grease a 9×13-inch pan or line it with parchment paper for easier lifting and cutting.
- Set a large heavy-bottomed pot over low heat and melt the butter gently, stirring so it does not brown unless you want that deeper flavor.
- Add 14 ounces of the mini marshmallows to the melted butter along with the vanilla extract and salt. Stir constantly over low heat until the marshmallows are fully melted and smooth.
- Remove the pot from the heat as soon as the mixture is glossy and melted. Overheating can make the finished bars firm instead of soft.
- Immediately fold in the crispy rice cereal and stir until every piece is evenly coated in the marshmallow mixture.
- Add the remaining 2 ounces of mini marshmallows and fold briefly. This gives the treats extra pockets of marshmallow throughout.
- Transfer the mixture to the prepared pan. Use a lightly buttered spatula or buttered hands to gently press it into an even layer. Do not pack it down too firmly or the bars can become dense and hard.
- Let the treats cool at room temperature for about 30 to 45 minutes, or until set enough to cut cleanly.
- Slice into 12 squares and serve.
Tips, Serving Suggestions & Substitutions
If I can give you one tip for the best rice krispie treats, it is this: keep the heat low. Marshmallows melt beautifully over gentle heat, and that is the secret to bars that stay soft and chewy. If the marshmallow mixture gets too hot, the sugar can tighten up and the bars may turn out stiff.
Another important trick is not to press the mixture too firmly into the pan. I know it is tempting to flatten everything down tightly so the top looks neat, but a light touch makes all the difference. I usually butter my spatula or my fingertips and gently nudge the mixture into the corners without compacting it.
For serving, these are wonderful exactly as they are, but you can also dress them up a little. Try dipping one side in melted chocolate, adding a few sprinkles for a party, or cutting them into smaller bite-size squares for dessert platters. They also pair really well with a cold glass of milk or a cup of coffee.
If you need substitutions, you can use large marshmallows instead of mini marshmallows by weighing them. Salted butter works too; just reduce or omit the added salt. If you want a slightly more homemade, bakery-style flavor, a little vanilla is lovely here, and browned butter adds even more depth. For a gluten-aware version, make sure your cereal is certified gluten-free and check the marshmallow packaging as well.
Nutrition Information
| Nutrient | Per Serving |
|---|---|
| Calories | 190 |
| Carbohydrates | 32 g |
| Protein | 1 g |
| Fat | 6 g |
| Saturated Fat | 4 g |
| Cholesterol | 15 mg |
| Sodium | 150 mg |
| Fiber | 0 g |
| Sugar | 18 g |
Nutrition values are approximate estimates per serving and can vary depending on the specific brands and ingredients you use.
Storage & Make-Ahead Tips
Once the bars are completely cool, store them in an airtight container at room temperature. I like to place parchment or wax paper between layers if I am stacking them. They are usually at their very best within the first 1 to 2 days, when the texture is softest and the marshmallow is still wonderfully chewy.
Avoid refrigerating them if possible, because the cold can make them firm. If your kitchen is especially warm, keep the container in a cool room out of direct sunlight. For make-ahead planning, you can absolutely prepare them the day before a party or gathering. Just cut them once set, store them well, and they will be ready to grab and serve.
FAQ
1. Why did my rice krispie treats turn out hard?
The two most common reasons are overheating the marshmallows and pressing the mixture too firmly into the pan. Use low heat and a gentle hand for the softest texture.
2. Can I use large marshmallows instead of mini marshmallows?
Yes, absolutely. Just use the same weight. Mini marshmallows melt a little faster, but large marshmallows work just fine.
3. How do I keep rice krispie treats from sticking?
Grease the pan lightly and butter your spatula or hands before pressing the mixture in. Parchment paper also makes removal and slicing easier.
4. Can I make these ahead for a party?
Yes. They are a great make-ahead dessert. I usually make them up to one day in advance and keep them tightly covered at room temperature.
5. Can I add chocolate chips or other mix-ins?
Yes, but let the mixture cool slightly first if you are adding chocolate chips, or they may melt too much. Sprinkles, extra mini marshmallows, or a drizzle of chocolate all work nicely.
Final Thoughts
If you are looking for a dependable, classic treat that is easy, nostalgic, and always a hit, these rice krispie treats are hard to beat. I love how quickly they come together and how that buttery marshmallow flavor never really goes out of style. Whether you are making them for kids, friends, coworkers, or just yourself, they bring a little bit of joy to every tray.
If you try this recipe, I would love to hear how it turned out for you. Leave a comment, share it with someone who loves an easy sweet treat, and save it to Pinterest so you can come back to it anytime you need a simple crowd-pleaser.
Rice Krispie Treats
Ingredients
Equipment
Method
- Lightly grease a 9x13-inch pan or line it with parchment paper.
- Melt the butter in a large heavy-bottomed pot over low heat.
- Add 14 ounces of mini marshmallows, the vanilla extract, and salt. Stir constantly until the marshmallows are fully melted and smooth.
- Remove the pot from the heat as soon as the mixture is glossy and melted.
- Fold in the crispy rice cereal until evenly coated.
- Add the remaining 2 ounces of mini marshmallows and fold briefly to distribute.
- Transfer the mixture to the prepared pan and gently press into an even layer with a lightly buttered spatula or buttered hands.
- Let cool at room temperature for 30 to 45 minutes, until set enough to slice.
- Cut into 12 squares and serve.
