
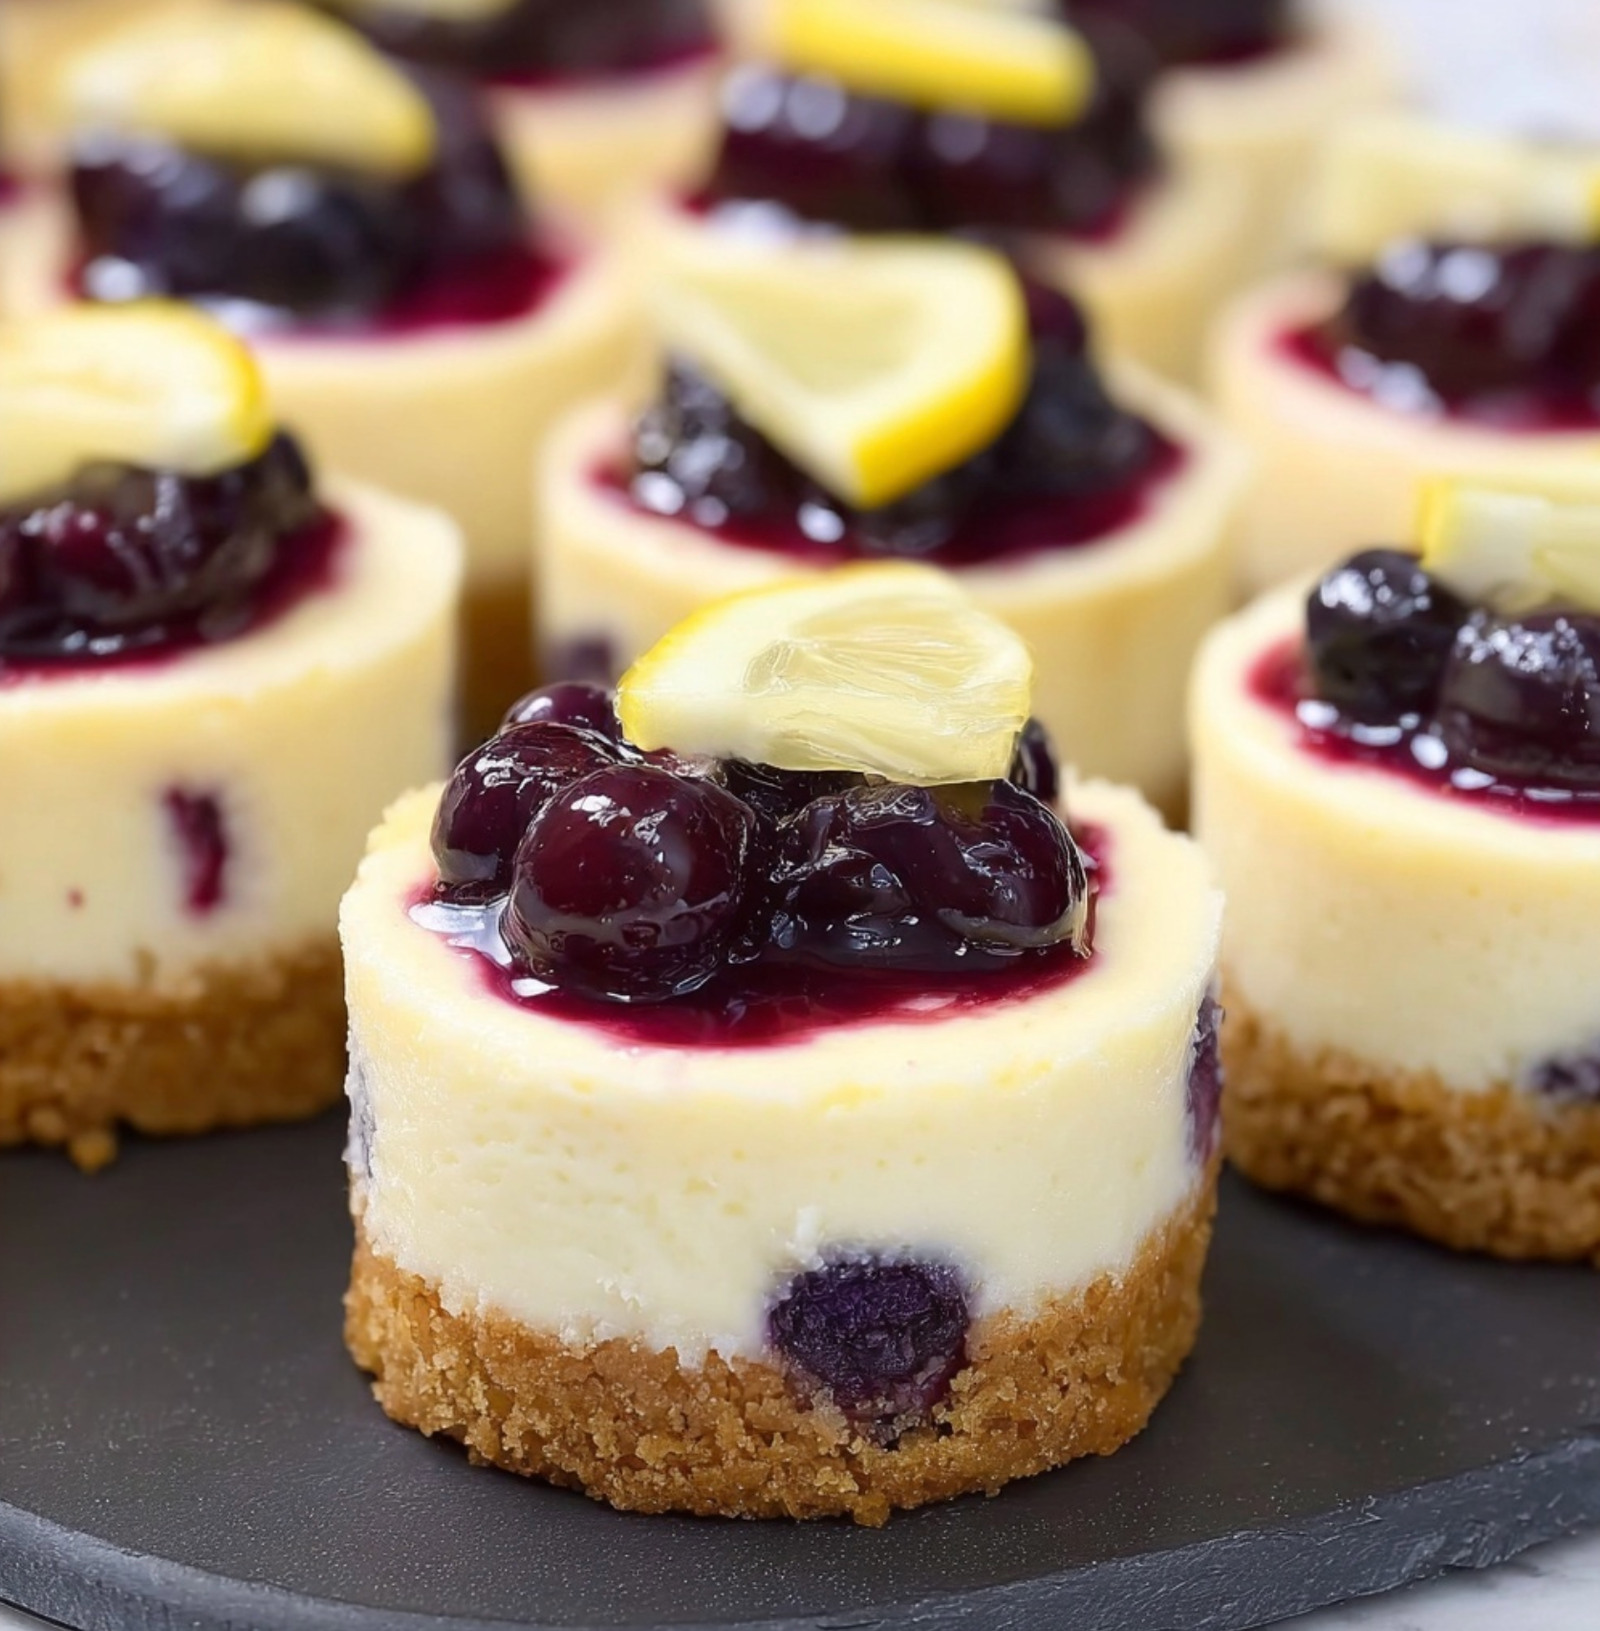
Hey there! I’m super excited to share one of my all-time favorite desserts with you—Juicy Mini Lemon Blueberry Cheesecakes! These little bites of sunshine are perfect for any gathering or just a cozy night in. I remember the first time I made these; it was a bright sunny day, and I decided to experiment in the kitchen. The tangy lemon mixed with sweet blueberries had my friends begging for seconds, and I just knew I had stumbled upon a winner!
Every time I whip up a batch, it takes me back to those sunny afternoons filled with laughter and joy. Plus, they’re so cute and easy to eat, making them a hit at any party. Trust me, once you try your hand at these, they’ll become a staple dessert in your home.
Flexible Valuable Section (Choose One or Both)
Nutritional Benefits
Not only are these cheesecakes delicious, but they also come with some pretty awesome nutritional perks. The blueberries are packed with antioxidants, which are great for your health. They can help boost your immune system and are known for their anti-inflammatory properties. On top of that, the cream cheese provides calcium and protein. So, you can enjoy a guilt-free treat that tastes indulgent!
Adaptable Variations
Feel free to get creative with this recipe! If you’re watching your sugar intake, you can swap out granulated sugar for a sugar substitute like Stevia or erythritol. For a gluten-free version, use gluten-free graham crackers for the crust. And if you’re not a huge fan of blueberries, you can easily replace them with strawberries, raspberries, or even a mix of your favorite fruits. The possibilities are endless!
Quick Info
- Prep Time: 20 minutes
- Cook Time: 30 minutes
- Total Time: About 2.5 hours (including chilling)
- Servings: 12 mini cheesecakes
The Recipe
Ingredients
- For the crust:
- 1 ½ cups graham cracker crumbs
- ½ cup unsalted butter, melted
- ¼ cup granulated sugar
- For the cheesecake filling:
- 16 oz cream cheese, softened
- ¾ cup granulated sugar
- 2 large eggs
- 2 tsp vanilla extract
- 2 tbsp lemon juice
- Zest of 1 lemon
- For the blueberry topping:
- 2 cups fresh or frozen blueberries
- ½ cup granulated sugar
- 1 tbsp cornstarch
- 1 tbsp lemon juice
- Lemon slices for garnish (optional)
Instructions
- Preheat the Oven: Preheat your oven to 325°F (160°C).
- Prepare the Crust: In a mixing bowl, combine graham cracker crumbs, melted butter, and sugar. Mix until the mixture resembles wet sand.
- Line the Baking Pan: Line a mini cheesecake pan or a muffin tin with paper liners. If using a cheesecake pan, ensure it’s non-stick or has been greased.
- Form the Crust: Press the crust mixture firmly into the bottom of each cavity in the mini cheesecake pan or muffin tin to form an even layer. Use your fingers or the bottom of a glass to pack it down tightly.
- Bake the Crust: Bake the crust in the preheated oven for about 5-7 minutes, until slightly golden. Remove from oven and let cool.
- Make the Cheesecake Filling: In a large bowl, beat the softened cream cheese with an electric mixer on medium speed until creamy and smooth (about 2-3 minutes). Gradually add in granulated sugar and continue to beat until well mixed.
- Add Eggs and Flavorings: Add the eggs, one at a time, mixing well after each addition. Then mix in vanilla extract, lemon juice, and lemon zest until fully incorporated.
- Pour the Filling: Divide the cheesecake filling among the prepared crusts, filling each cavity nearly to the top.
- Bake the Cheesecakes: Bake the cheesecakes in the oven for 18-20 minutes, or until the edges are set and the center is slightly jiggly. The cheesecakes will firm up as they cool.
- Cool Down: Turn off the oven, crack the oven door, and allow the cheesecakes to cool in the oven for about 30 minutes to help prevent cracking. Then remove from the oven and refrigerate for at least 2 hours, or until completely chilled.
- Prepare the Blueberry Topping: In a saucepan over medium heat, combine blueberries, sugar, cornstarch, and lemon juice. Stir frequently until the mixture begins to bubble and thicken (about 5-7 minutes). Remove from heat and let cool slightly.
- Top the Cheesecakes: Once the cheesecakes are chilled, remove them from the pan. Spoon the blueberry topping over each cheesecake.
- Garnish: Optionally, garnish each cheesecake with a small slice of lemon for a decorative touch.
- Serve: Enjoy these juicy mini lemon blueberry cheesecakes chilled as a delightful bite-sized dessert!
Practical & Valuable Tips
- Make sure your cream cheese is really soft to achieve that creamy texture. Leaving it out at room temperature for about 30 minutes usually does the trick.
- If you have any leftover cheesecakes, store them in an airtight container in the fridge. They’ll last about 3-5 days—if you can resist them that long!
- For a fun twist, add some crushed lemon zest into the blueberry topping for an extra zing!
- Use a small cookie scoop or a piping bag to distribute the cheesecake filling evenly among the crusts; it makes the process so much easier!
Equipment Needed
- Mini cheesecake pan or muffin tin
- Electric mixer
- Mixing bowls
- Measuring cups and spoons
- Spatula
- Small saucepan
Frequently Asked Questions
- Can I use low-fat cream cheese? Absolutely! It will work just as well, but the texture may be a little less creamy.
- What other fruits can I use for the topping? You can use any fruit you like! Strawberries, raspberries, or even a mix would also be delicious.
- Can I make these ahead of time? Yes, these cheesecakes are perfect for making a day or two in advance!
- How do I know when the cheesecakes are done baking? They should be set around the edges but still a bit jiggly in the center. They’ll firm up in the fridge!
- Can I freeze these cheesecakes? Yes! Freeze them after they’ve cooled completely, and wrap them tightly. Just thaw them in the fridge overnight before serving.
So there you have it—my recipe for Juicy Mini Lemon Blueberry Cheesecakes! I genuinely hope you give this a try because once you do, I know you’ll love them just as much as I do. Don’t forget to share your thoughts, ask questions, or show off your delicious creations in the comments below. You can also follow me for more delightful recipes and kitchen adventures. Happy baking!
